Spring Flowers and Bees

Thursday, March 30, 2006

Mango Panna Cotta

Mango Panna Cotta

What is panna cotta? Why do I see it everywhere, on TV, on people's blog, on the menu I read off a newspaper? How come I've never come across it? Why haven't I tried it?

Rather than waiting til the time has come to eat panna cotta at some restaurant somewhere, I urged myself to make one. Yes, that has been my motto. When you want something, you make it. This is especially true for food :)

Since coming to Canada, I have ventured here and there in the world of food. Trying to make something I never made before. For example, when I want a Black Forest Cake, I made it, instead of buying. Soon after, I had this weird, self-centered idea that nothing will be as good if it's not homemade. I meant that for any commercial products that contains some kind of chemical. Only homemade foods that has no artificial ingredients are the BEST.

Now I'm only rambling. So, better shift your attention to my spongy creamy Mango Panna Cotta. This may be the worst panna cotta ever in terms of texture. As you can see, I had some open holes on the surface and it was really hard to get it out of the mold. In contrast, the flavour lives up to my expectation :) Mango, tangy buttermilk, and whipping cream are perfect with each other! This reminds me so much of the Mango Pudding I used to have when having yum cha with my extended family.

The recipe itself was a modified version of the one I found at Epicurious.com. I basically use this recipe as the basic and substituted all of the blackberries with mangoes. However, I added some personal addition such as the diced mangoes for some bites in the panna cotta. I hope you like it. Any notes for improvements are always welcome.

Mango Panna Cotta

Mango Panna Cotta 02

2 medium sized mangoes (I used the one w/ green-and-red skin)

1-1/4 cups buttermilk, well shaken
2-3/4 tsp unflavored gelatin
1/4 cup water
1-1/2 cups whipping cream
2/3 cup granulated sugar
1/2 tsp vanilla extract, optional

01. Peel the mangoes. Roughly chop 1-1/2 of the two mangoes, while dice the rest of the mango into 0.5 cm cubes. Set the mango cubes aside.
02. Place the roughly chopped mangoes and buttermilk in a blender or food processor. Puree until smooth. (At this point, you are supposed to strain the puree and throw away the pulp. I skipped this part because I like mangoes too much I even like the pulps)
03. Sprinkle gelatin into the water. Let it stand until gelatin softens, about 2 minutes.
04. Meanwhile, heat cream in a saucepan with sugar on medium heat. Stir to dissolve the sugar. Once dissolved, remove from heat.
05. Add the gelatin into the warmed cream. Stir until combined. Transfer to a larger bowl.
06. Pour the pureed mango into the cream-and-gelatin mixture, stir until combined.
07. Prepare a sieve over an empty bowl, then strain the mango mixture, discard the curd. (Again, I skipped this part for fear of losing the goodness of mangoes and some of the gelatin)
08. Sprinkle mango cubes into the mixture.
09. With a big spoon, pour the mixture carefully into the prepared molds (you can use ramekins).
10. Chill for at least 8 hours.
11. Serve with fresh strawberries and a bath of whipping cream.

It was really good eaten with fresh strawberries since the sweetness from the panna cotta compliments the soury goodness of strawberries!

Saturday, March 25, 2006

Something Out of Nothing ~ Ciabatta Tuna Sandwich


It has been a while since I have the desire to take my first shot in participating in one of IMBB events. A while ago, it was fun looking at people's creation and especially admiring the nicely assembled pictures. A while ago, I was not encouraged enough to take part, mostly because I only found out about the event right after the round-up. A while ago, not too long back, I checked the schedule over at IMBB and got my eyes caught at this one-time event. That while ago is now. And now is time to finally share my creation in an IMBB event :)

This so-called "Something Out of Nothing" is a one-time event hosted by Lindy from Toast. This has caught my attention, because I'm probably one of the people that would rather prepare low-cost yet tast dishes for daily comsumption. I am a STUDENT!

So, ever since I've heard about this event (which was not even a week ago) I have been thinking of what taste-bud enticing meals I could prepare from anything that is sitting inside my fridge right now. I turned my head around. Thinking about my easy-to-prep Lemon Garlic Brussel Sprouts, then comforting Pancetta Omelette, and recently a very simple dish calling only 5 ingredients called Stir-Fried Green Beans with Ground Beef.

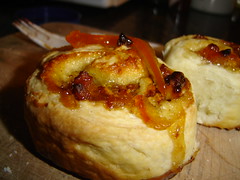
Nonetheless, I have this leading candidate, that I have made before I was aware of this event. Guess no more, it's a 
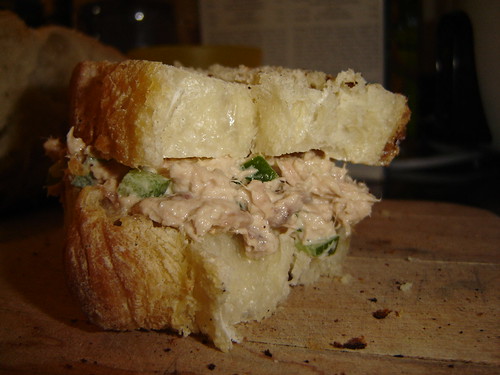
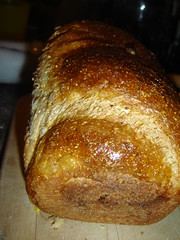
Ciabatta Tuna Sandwich with Homemade Ciabatta Bread :)
I just thought this would be suitable because I literally created the Ciabatta bread 
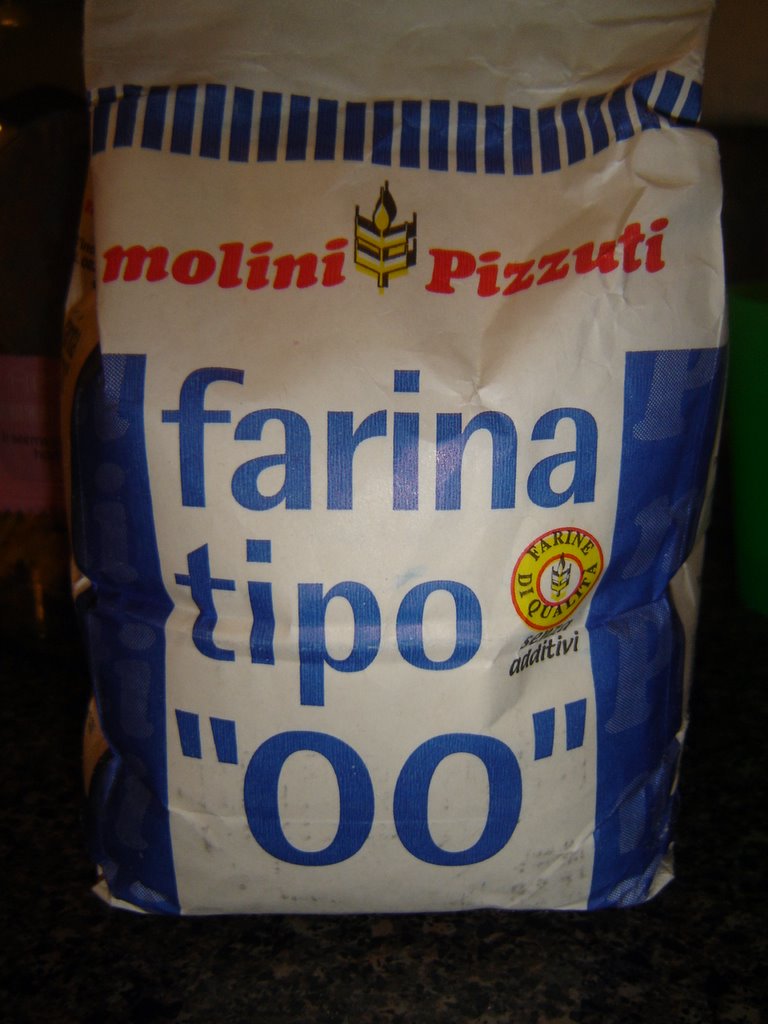
from scratch, consisting only bread flour, instant yeast, water, and salt. Baking an artisan bread is again very rewarding, but to note, the process is quite laborious. The process took me up to two days including making the pre-ferment. The day after the pre-ferment was made, the real process of making Ciabatta begun. It took me around 7-8 hours after the pre-ferment was ready.

So, I admit it was time-consuming. But, you can still do it in between your normal activity. Trust me, they are quite low-maintenance :)
The recipe for Ciabatta was followed accordingly with Peter Reinhart's renowned "The Bread Baker's Apprentice".

The Ciabatta itself should be nicely complimented with plain cream cheese, nutella, or even toasted in margarine. However, I felt like jazzing it up a little bit, so I notoriously assembled my creation of tuna spread :) I took out whatever I could find in my fridge, and ta-da! A delicious fresh tangy and salty tuna sandwich. The two Ciabatta slices absorbed all of the flavors very well, making it even more delicious.

Shall get on to the recipe? I've dragged you long enough, haven't I?


Ciabatta (Biga Version)
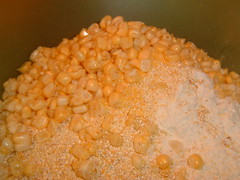
Biga

2-1/2 cups unbleached bread flour
1/2 tsp instant yeast
4/3 cup plus 2 T to 1 cup water, at room temperature

01. Stir together the flour and yeast in a 4-quart bowl. Add the 3/4 cup plus 2 T of water, stirring until everything comes together an makes a coarse ball. Adjust the flour or water, according to need, so that the dough is neither too sticky nor too stiff.
02. Sprinkle some flour on the counter and transfer the dough to the counter. Knead for 4 to 6 minutes, or until the dough is soft and pliable, tacky but not sticky.
03. Lightly oil a bowl and transfer the dough to the bowl, rolling it around to coat with oil. Cover the bowl with plastic wrap and ferment at room temperature for 2 to 4 hours, or until it nearly doubles in size.
04. Remove the dough from the bowl, knead it lightly to degas, and return it to the bowl, covering the bowl with plactic wrap. Place the bowl in the fridge overnight to bring out more flavors. This can be kept in the fridge for up to 3 days, or freeze in an airtight plastic bag for up to 3 months.

Ciabatta

3 cups biga
2 cups unbleached bread flour
1-1/2 tsp salt
1-1/2 tsp instant yeast
3/4 cup plus 2 T to 1-1/8 cups water, lukewarm
1/4 cup olive oil (optional)

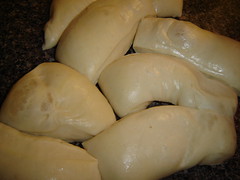
01. Remove the biga from the refrigerator 1 hour before making the dough. Cut it into 10 small peices with a serrated knife. Cover with a towel or plastic wrap and let sit for 1 hour.

Ciabatta - Biga
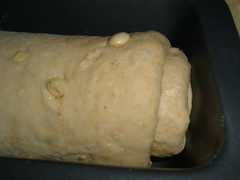
Smooth-textured biga :)

02. To make the dough, stir together the flour, salt, and yeast in a 4-quart mixing bowl. Add the biga pieces and 3/4 cup plus 2 T water and the oil. With a large spoon, mix until the ingredients form a sticky ball. If there is still some loose flour, add the additional water as needed and continue to mix.
03. With your hands, repeatedly dip one of your hands or the spoon into cold water and use it, much like a dough hook, to work the dough vigorously into a smooth mass while rotating the bowl in a circular motion with the other hand. Reverse the circular motion a few times to develop the gluten further. Do this for 5 to 7 minutes, or until the dough is smooth and the ingredients are evenly distributed.
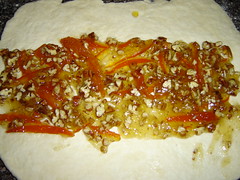
04. Sprinkle enough flour on the counter to make a bed about 8 inches square. Using a bowl scraper, transfer the sticky dough to the bed of flour and proceed with the stretch-and-fold method shown below.

"Stretch-and-fold Method" ~ this is the fun part!
A) Dust the top of the dough liberally with flour, patting the dough into a rectangle. Wait 2 minutes for the dough to relax. Coat your hands with flour.
B) Lift the dough from each end, stretching it to twice its size.
C) Fold the dough over itself, letter style, to return it to a rectangular shape.

04. cont'd - Mist top of the dough with spray oil (I rubbed regular oil with my hands), again dust with flour, and loosely cover with plastic wrap.
05. Let rest for 30 minutes. Stretch and fold the dough again; mist with spray oil, dust with flour, and cover. Allow the covered dough to ferment on the counter for 1-1/2 to 2 hours. It should swell but not necessarily double in size.
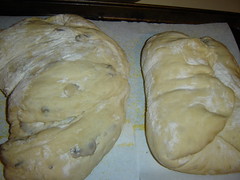
06. Set up a long tea towel on your conter. Carefully remove the plastic from the dough. Divide the dough into 2 or 3 rectangles with a pastry scrapper carefully not to degas the dough. Sprinkle the dough generously with more flour and, using the scraper to get under the dough, gently lift each piece from the counter then roll it on both sides in the loose flour to coat. Lay the loaves on the tea towl and gently fold each piece of dough, from left to right, letter style, into an oblong about 6 inches long. Bunch the towel between the pieces to provide a wall. Mist the dough with oil and dust the dough with more flour, then cover with another tea towel.
07. Proof for 45 to 60 minutes at room temperature, or until the dough has noticeably swelled.

Ciabatta - Baking

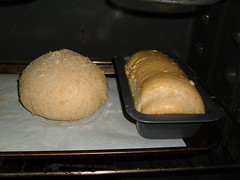
08. Prepare the oven by placing an empty steam pan before turning the oven on. Preheat to 500 degrees F.
09. Line your baking sheet with parchment paper. Carefully transfer your dough onto the baking sheet and slide it into the oven. Pour 1 cup of hot water into the steam pan and close the door. After 30 seconds, open the door, spray the side walls of the oven with water, and close the door. Repeat twice more at 30-seconds intervals. After the final spray, turn the oven setting down to 450 degrees F and bake for 10 minutes. Rotate the loaves 180 degrees for even baking, and continue baking for 5 to 10 minutes longer or until evenly golden brown. The loaves will feel quite hard and crusty at first but will soften as they cool
10. Transfer the bread from the oven to a cooling rack and allow to cool for at least 45 minutes before slicing or eating.

Ciabatta

Phew, that was a long recipe to type :p

Now for the 
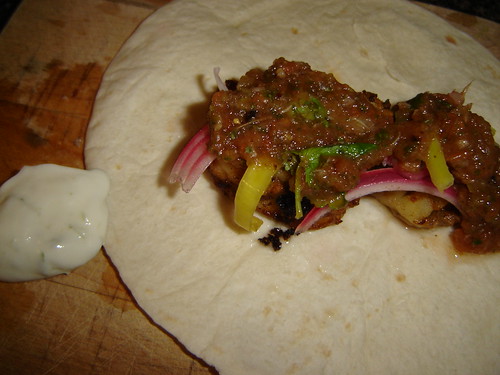
tuna filling, you will need:

1/2 of small can of tuna in olive oil
2 strips of anchovies, shredded, microwaved (to soften the bones)
1/4 of green bell pepper, diced
2 to 3 T plain mayonaisse (I used Japanese QP "KewPee" mayo)
1 to 2 tsp freshly squeezed lemon juice
freshly ground black pepper
salt

Combine all ingredients in one bowl, then spread them liberally in between two slices of fresh Ciabatta bread. Adjust according to your taste.
Wrap it in plastic wrap for lunch at school :)

To make this lenghty process like a zap, buy a fresh Ciabatta bread from your local grocery! Simple as that ;)

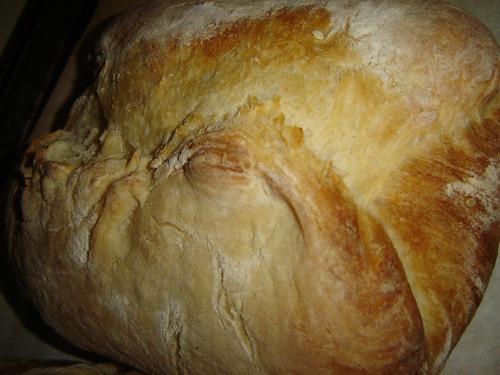
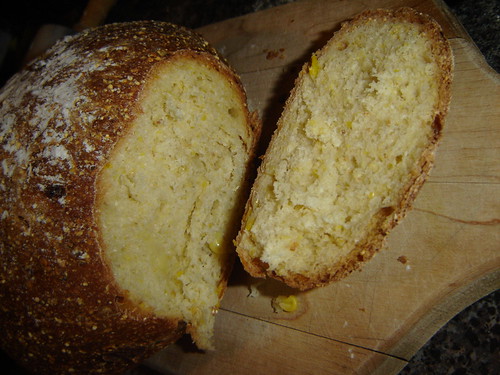
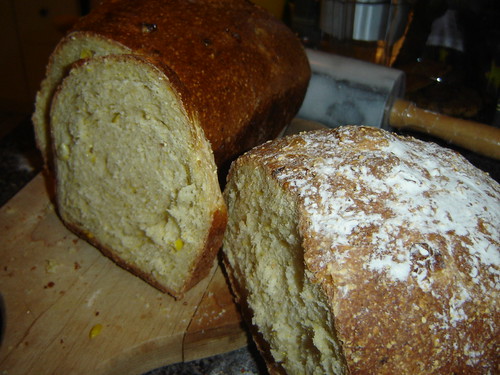
As usual, after baking an artisan bread, I usually learnt or observed something. This, time I need to warn myself not to bake in very high heat (500F) with cornmeal dusted on the baking sheet. The result is,
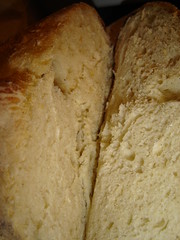
 burnt-bottomed bread!!
Also, I have to share with you that the Ciabatta didn't turn out as well as it should be, mainly because I didn't follow the instruction carefully. Here the instruction is clear (and long, I know) and it should be alright when you try to make it :)
Mine doesn't have the airy holes I longed for, next time it will be better. Practice in artican baking is a cruicial factor anyway :)


My Garlic Turns Turquoise!


Please, let me share my amazement to this newly found fact :) and please, bear with my silliness for even reporting this.

As I was baking my Lemon Garlic Brussel Sprouts, I came across a surprising scene. There were turquoise garlic mince sitting around my fragrant halved brussel sprouts. Since when does garlic turn greenish blue when baked?! Don't they just brown or burnt when baked?

Then... I quickly recalled the grilled whole garlic sold at Scheffler's Deli at St. Lawrence Market. I had the same reaction at that time and thought it was bizzare :) And now it happened right in my very kitchen! Don't get me wrong, my garlic was as fresh as it can get, so it's not rotten!

To feed my curiosity, I did a teensy bit of research. It turns out that garlic does turn blue when it reacts with acid (which was the lemon juice) over a high temperature. Then I left with a big "O"...

:O

Sunday, March 19, 2006

Seville Orange Marmalade


This week seems to be yet another colorful week to me. Not only food, but also my surroundings :)

I am so thankful for that!

First off, I would like to share my last week's market finding, Seville oranges. I have caught their name somewhere in someone's blog, thus I hesitated no more to try these oranges. Then, at the cashier counter, the lady told me that it's very sour thus only used for cooking purposes. "OoOOoow.." said me. Later on, I browsed the internet for a recipe that requires Seville oranges. And realized that I have just bought the perfect oranges for Marmalades! Yay! I have already pondered on making marmalade before and to have come across the perfect one (by accident) is a bliss!

From there on, began my cooking quest for my 1st jar of homemade marmalade. To be honest with you, I have never tasted orange marmalade before!

I browsed and browsed for recipe and finally decided to use this one. If you would, please let me guide you through the making of it that has been modified for smaller batch.

Seville Orange Marmalade

3 Seville oranges
3 cups granulated sugar
25 ml orange liquor (optional)

Directions:
1) Wash the oranges with cold water, then cut them into sixths or eights. Place the pieces in a heavy-botton pan and cover with water over medium high heat.

Seville Orange

2) Bring the water to boil, then reduce the heat. Simmer for 1 to 2 hours until very soft. You should be able to rub the peel to almost nothing between your fingers. Turn off the heat
3) Lift out oranges from cooking water with a slotted spoon, and scrape out the inside pulp and pips using a spoon (with a help of a fork to hold the other side in case the oranges are still too hot). Put the pulps on a sieve (that is placed above a bowl) and press out remaining juice from the pulp. Pour the juice back into the pan.
4) Collect the cleaned peel on a cutting board. Cut the peel into 3 mm strips then put them back into their cooking water.
5) Leave them overnight in order to better release their pectin.
6) Next morning, add one cup of sugar then bring the mixture slowly to a boil. After that, reduce the heat and simmer for one hour.
7) Add the other 2 cups of sugar one cup at a time. Bring the mixture to a boil again. Then simmer again, until you have got the desired consistency of your marmalade. I simmered it for around 30 minutes more and the consistency was perfect.

Seville orange marmalade

8) Cool for 20 minutes, add orange liquor if desired. Then pour mixture into a sterilized jar and seal immediately.

Seville Orange Marmalade

Serves: app. one 500 ml jar.

I did not use any preservatives or pectin, yet my marmalade has the perfect consistency of a jam! I love the result :)

However, having never tried orange marmalde before, I was surprised with the taste. Because I was using Seville oranges, the marmalade has a combination of bitter, sour and sweet taste. I actually find it hard to like the bitter flavor, which is mostly found in the peel. Nonetheless, I still love oranges and making orange marmalade was a lot of fun!

I was also amazed with the fact that Seville orange originated in Seville, Spain. I thought it was a cool fact :)

Now, the best part is, I am going to share with you how I utilized this prized orange marmalade. Actually, I have a very limited knowledge on the utilization of orange marmalade, but I tried my best to provide you with at least one recipe. Any suggestion for the use of orange marmalade is always OPEN!

Orange Marmalade Buns
(adapted from About.com)

Orange Marmalade Buns

1 1/2 cups all-purpose flour
1/2 T + 1/2 tsp baking powder
1/4 tsp salt
1/4 cup butter
1/2 cup buttermilk
1/2 cup orange marmalade
1/2 cup pecans, chopped

Directions:
1) Sift together flour, baking powder, and salt in a large bowl.
2) Cut in butter with a pastry blender or knives until mixture is fine, even crumb (I used my hands to mix in butter)
3) Add milk and stir just until dry ingredients are moistened.
4) Turn dough out onto a lightly floured surface and knead about 10 times, until a smooth ball is formed. Roll out dough to a rectangle.
5) Meanwhile, combine the pecans and marmalade on a small bowl.
6) Spread evenly over the dough; roll up as for a jelly roll, starting at long edge.

Orange Bun spread

7) Cut roll into 7 slices. Place slices, cut side down, in a generously buttered 9-inch round layer cake pan.
8) Bake at 400° for 30 to 35 minutes, or until lightly browned. Serve warm.

Serves: app. 7 mini orange marmalade buns

Note: I find it better to use only the jam part of the marmalade and discard the peel as I find it to be too bitter. However, if you are using navel oranges for the marmalade, you may not want to throw away the peel.

I generally like this biscuit-based buns since I have developed a love for pecans and orange jams. Another way that I have used my orange marmalade is for a pancake topping. The recipe for a nice fluffy pancake can be found here.

Before I igo, I would like to leave you with a note. Especially for Torontonians :)
My another colorful encounter this week was... the opening exhibition of Afghanistan Photography (Return, Afghanistan) by Zalmai at U of T Scarborough's Doris McCarthy Gallery.
These photographs are truly remarkable! And I urge you who just happen to be nearby to pay a visit to this tiny gallery. The exhibition runs until May 12.

On the opening night, I had the privillege (or luck) to attend to its opening celebration where we were entertained with food, dance, and music. I will be in touch with you more about this since I will be exploring about the Middle East starting this week.

Doris McCarthy Gallery
1265 Military Trail
Scarborough, Toronto
Tuesday to Friday 10a - 4p
Sunday noon - 5p

Saturday, March 11, 2006

Colorful Foods :)

*updated* March 15 2006


Look what I've been eating this week I mean, what kind of homemade food I've been making throughout my ever-busy weekdays. Why did I say weekdays, did I mean to exclude weekends? Yes, probably. Weekends are too nice to be spent on doing homeworks or required readings. Especially a weekend like today.

Today in Toronto is bright and warm (only if you're wearing a proper jacket though :p ), and I knew that all along, so Mr. W and I went to downtown as early as we could. We left at 8 o'clock (which means I had to get up around 7.30) and arrived in Union station just a tad past 9am. Wonder where we went? Wonder no more, we revisited St. Lawrence Market!

Believe it or not, it's my 3rd consecutive visit to St. Lawrence :) Have gone crazy or something? I live in a suburb and the market is way in the heart of Toronto! But, I love morning, and I think I'm a morning person. And our market adventure was again extraordinarily fun! We've never been to downtown this early and I sure like it :)

Usually, now is about the time I share about my findings in the market. But, I am not going to do that this time with fear of being boring. :p I will talk about something else instead, something out of the blue.

Last week I was talking to a friend and suddenly this subject of foods having country of origin's name came up. What I meant by that is some foods that are named partly after a country or a part of a country. For example Italian Sausage. Then, she protested me of stereotyping (of course, she was joking!). Stereotyping foods, eh? That's pretty interesting, I thought. On the other hand, this is not like negative sterotyping or anything. Although the nature of the word "stereotyping" is actually negative :p But, it's interesting, because if you pay attention there are sooo many that could go on the list! Let me start my own list. This is not done with any prior reasearch. Only prior knowledge ;)

Israelli couscous
Japanese breadcrumbs (panko)
Greek-style Yogurt
Italian Gelato
Jerusalem Artichoke

Honestly, I can't recall anything else right now. Please join me if you like :)

Now, to the main topic. The homemade foods of the week... and the theme is COLOURFUL!

First dish:
Couscous with Yam and Carrot Stew
(recipe adapted from Epicurious)


This was supposed to be a vegetarian delight. It was in some sense, but not really in another. The idea is nice and I love experimenting with unfamiliar ingredient like couscous. However, I didn't follow the recipe word per word. Instead, I substituted the butternut squash with yam and I could have used the wrong paprika (I don't know if mine if Hungarian). The recipe for the couscous itself I think was pretty good, using butter, garlic, and turmeric for color. On the other hand, the stew upset my stomach a little bit. I'm afraid I have an intolerance for squashes and yams. As far as I could recall, I made a butternut squash soup a month ago and it always left my stomach groaning. Uh-oh...

Second dish:
Fish Taco Platter
(again, from Epicurious)


I truly had fun making this Mexican dish :) And even better, it paid off! On the night this platter was made, I ate three (small) taco wraps :9 I love the (long) process of making this dish because everything was new to me. First I had to char some vegetables under my broiler (never done that before on purpose) then I had to pickle some red onion and jalapeno, and finally I had to add lime rind into my sourcream and mayo mixture.
Although, again, I didn't follow every single step because I couldn't find tomatillo. I replaced it with Roma tomatoes instead (there you go again!). The final taste for the salsa was alright, I had to add a splash of tabasco for more flavor though :p Other than that, the pickle was fantastic and so was the baja cream! Pardon my amazement, but it was my first time pickling anything! I was so amazed when the vinegar bath turned deep pink (like a grapefruit color) after an hour.


Finally, never had fish taco too! So it was a great experience and would certainly be great for a get-together meal!

Dessert:

This delicious Mascarpone Cheesecake was made with fresh ingredients obtained from St. Lawrence Market at the same day. I love the fact that I got to pack my own farmer's cream cheese in the 18 oz container :) This farmer's cream cheese differs from the packaged Philadelphia cream cheese, it's much more spreadable and creamier. As a result, my cheesecake was creamier, yet lighter. I also love the candied pecans! I think I'm falling in love with pecans! Thanks to Ivonne for recommending this recipe :)


I hope you enjoyed this colorful passage :)


Tuesday, March 07, 2006

Artisan Baking - Hi-Rise's Corn Bread


I know, I know.... I promised you to share my cornbread as soon as they popped out of the oven. It has been well over two days now and I am just starting to report my artisan baking adventure :p

Baking an artisan bread is truly rewarding. All the hardwork (I mean as in kneading the dough all by hand) and the waiting time truly paid off!

Oh only if you could smell my kitchen as the stone-ground cornmeal and fresh corn kernels were intermingling with the wonderful dough of mine. It was such a pleasure watching them get golden in the oven that I am posting the pictures of them while still in my electric oven. Even though it was two days ago, let's pretend that it's happening right here right now ;)

In this dough, you will find fresh ingredients such as corn kernels, honey, and freshly-ground white cornmeal. And just as described in her book, Maggie Glezer said "This wonderful yellow pan-bread repletes with fresh corn kernels and cornmeal." Later on, you will find a technique in shaping a loaf. Now, everyone can do artisan baking in their very home kitchen!

Why yellow pan-bread? Because this bread is proofed in a loaf pan :) However, since I only own one loaf pan, I shaped the other half of the dough into a Boule (or miche or round loaf). Also, this time I used a newly-packed unbleached strong white wheat flour I got directly from Rube's in the afternoon. I was so excited and thrilled with the anticipation of one successful bread, in shape and and in taste :) I just couldn't wait.

This loaf took me approximately 7 hours. That was the very reason why I slept at three o'clock in the morning that night and totally ruined my biological clock!

Hi-Rise's Corn Bread

Cornbread - loaf style

Poolish
1 1/4 cups unbleached bread flour
1 1/2 teaspoons instant yeast
3/4 cup water, lukewarm

Combine the flour and yeast is a large bowl, then beat in water. This will be a very gloppy batter. Cover the poolish tightly with plastic wrap and let it ferment until it is very bubbly and well risen, about 2 hours. (Mine was not that bubbly, and it still turned out nice)

Dough
2/3 cup water, lukewarm
Fermented poolish
2 1/1 cups unbleached bread flour
1 cups plus 2 tablespoons stone-ground yellow of (preferably) white cornmeal
app. 3/4 cup fresh corn kernels (1 large ear)
2 large (plus 1 for the glaze) eggs
2 tablespoons honey
1 1/2 tablespoons vegetable oil
1 tablespoon salt

Cornbread - ingredients

Combine the flour, cornmeal, and corn in a large bowl. Add the watered poolish, 2 of the eggs, the honey, and oil. Stir the mixture with your hand until it forms a rough dough. Turn it out onto your work surface and knead it, without adding flour and using dough scraper to help (you are crushing the corn kernels into the dough as you knead). When the dough is soft and sticky, add the salt. Knead until the salt is dissolved and the dough is tighter and very smooth, about 2 minutes.
This is a soft and sticky dough.

Fermenting the dough:
Place the dough in a container at least 3 times its size and cover it tightly with plastic wrap. Let the dough ferment until it is light, well expanded, and doubled in bulk, about 1 1/2 hours.

Shaping and proofing the dough:
Generously butter two 9 x 5-inch baking pans. The the fermented dough in half. *this is where the loaf-rolling technique starts* Using a rolling pin and plenty of extra flour for dusting this sticky dough, gently roll out one piece about 1/4 inch thick, pressing our all bubbles. For the sides of the dough into the center, letting them overlap by 1 inch or so. Roll out the dough again so that it is as wide from folded edge to folded edge as your baking pan. Moisten your hands with water and lightly pat the dough so that it is just slightly tacky. Now roll the dough up like a carpet, keeping the folded ends on either side. Pinch the seam to seal it and lay the cylinder seam side down in one of the prepared pans. The cylinder should fit length-wise but should not touch the sides of the pan. Repeat with the other piece of dough. Cover the loaves tightly with plastic wrap and let them proof until risen 1 inch above the pans, about 2 hours.

Cornbread - Dough on a pan

Preheating the oven:
About 30 minutes before the breads are fully proofed, arrange a rack on the oven's bottom shelf and clear away all racks above the one being used. Preheat the oven to 350 degrees F.

Baking the bread:

Cornbread Duo - Halfway done

Beat the remaining egg until blended and brush the tops of the loaves with it. Bake the breads until well browned, about 50 to 60 minutes, rotating them halfway into the bake. Remove the breads from the pans and let them cool on a rack.

... I am so tired after typing the whole content of this corn bread recipe. I am exhausted, but hey, I have pictures for you to enjoy, right?

*update* As in texture, this loaf didn't quite achieve the end result that I had expected, white, creamy and dense. Instead, this bread is light, yellow, and a little bit on the dry side. Almost like the characteristics of a Dempsters bread, only drier. I didn't get the texture that I wanted only because I haven't found the right recipe. To enjoy them, simply spread a thin layer of butter or margarine and toast. The simplest way is always the best. The toasting brings out the very filling flavor of corn and the butter adds savory-ness. Yummm...

Sunday, March 05, 2006

Treasures of St. Lawrence Market

Guess what I have been eating for almost everyday this week?
.
..
...
....
.....


Gnocchi a la Bava exactly as presented by Ivonne! And to tell you the truth, I have grown to love them. Wait, that means I was not that into gnocchi before?
Correct.
However, each time I prepare my gnocchi brunch or dinner, I discover something new. At first, I didn't know how much cheese and butter I should be putting in for a single serving. One time, I put too much butter and added salt, that's not the real taste! I've learned my lesson and always try to adjust the saltiness by adding or decreasing the grated Parmigiano Reggiano afterwards. Also, the more often I eat them, I developed an appreciation toward gnocchi. I was just starting to realize how fluffy and slightly (very subtly) elastic these gnocchi are. The best thing is to be able to taste the comforting aroma of baked russet potatoes. As I'm writing, I'm thinking about it..
Ha, maybe I'm just exaggerating.


These two created my all-week-long delicioius gnocchi :)


As a no cheese expert, I began to appreciate cheese more too :) I like the taste of springy Danish Fontina cheese, they are like mozarella, only sharper. Next, I have been having problem with Parmesan cheese block I obtain from the grocery; they always come out sort of weird. I have no idea why, it was weird to me so it was for my sister. However, on my quest to St. Lawrence last week, I bought the smallest amount possible for Parmigiano Reggiano for this gnocchi. Apparently, all I got next was nothing but authenticity :) This is the best hard cheese I've ever had. It slightly smells like the tangy pineapple as I grated it and very appetizing.

The beautiful thing is, these cheeses are eaten at their best with gnocchi, melted!! Yum! If you're looking for the perfect gnocchi recipe, this is truly the one.


Forgive me if my observation is too far-fetched or inaccurate.

These cheeses are truly gems of St. Lawrence market while you can't find them in regular supermarket.

Another treasure of St. Lawrence Market is Rube's Rice that I mentioned in the previous post. I am currently baking my 2nd artisan bread, Hi-Rise's Cornbread, which almost all ingredients come straight from this lovely place. I bought a bag of "unbleached hard white wheat flour" and a scoop of white cornmeal, both were claimed to be stone-grinded. What a finding! Being deprived from good flour (for lack of senses) for a few months, I am one happy girl now.
And, don't worry, I am going to share my cornbread as soon as they pop out of the oven.

My bread is baking and smelling REALLY good right now. It's the only reason I'm still up and awake at 2 in the morning :)